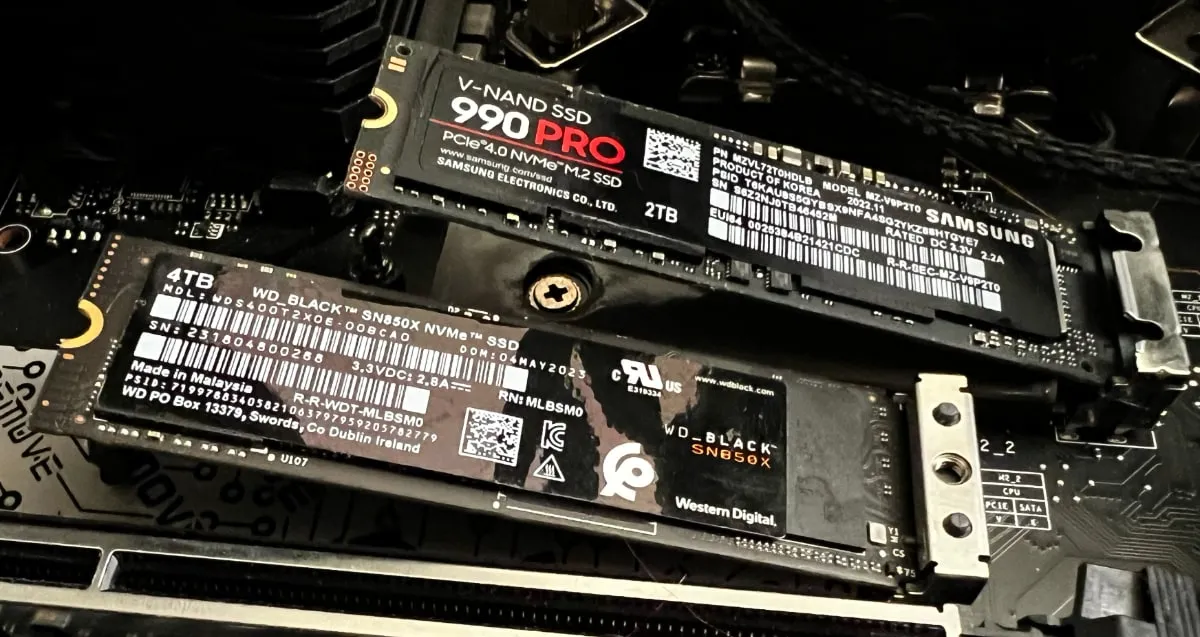

 When you have just installed a brand new SSD, and not for cloning Windows but to use as a secondary storage device, you will soon notice that it is not usable by Windows in its current state. This is not because it's broken, but rather because it's in pristine condition and lacks a file system. To get it to work in Windows 11 (or any version of Windows), any new SSD must first be initialized and formatted.
The good news is that this is a straightforward process and you can have your new drive up and running within minutes. All you need is the Disk Management tool built into Windows. If you prefer an even easier method, it can also be done via the Settings app in Windows 11.
Method #1: Disk Management Tool
Note that we are using Windows 11 here, but these steps will look virtually identical in Windows 10.
Step 1: Open Disk Management
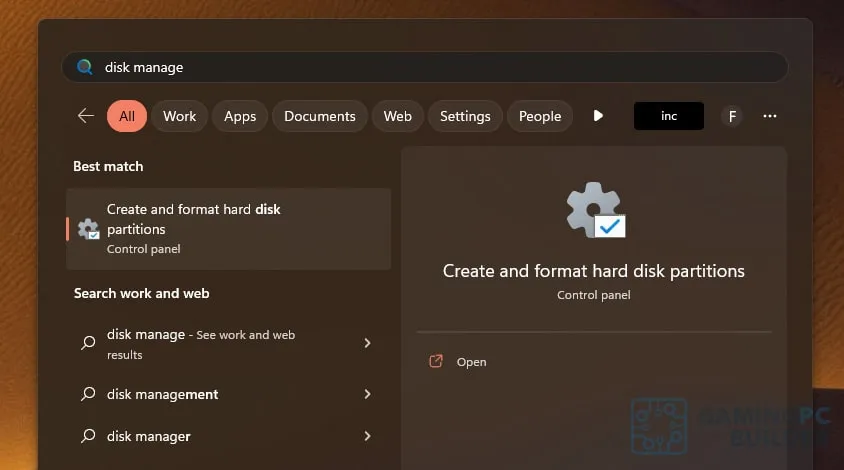
With the new drive freshly installed, open up the Disk Management tool, which is built into Windows. There are several ways to reach it, but the easiest is probably to press the Windows key and start typing "disk management". Then click on the best match, which should be 'Create and format hard disk partitions'.
Step 2: Identify Your New SSD
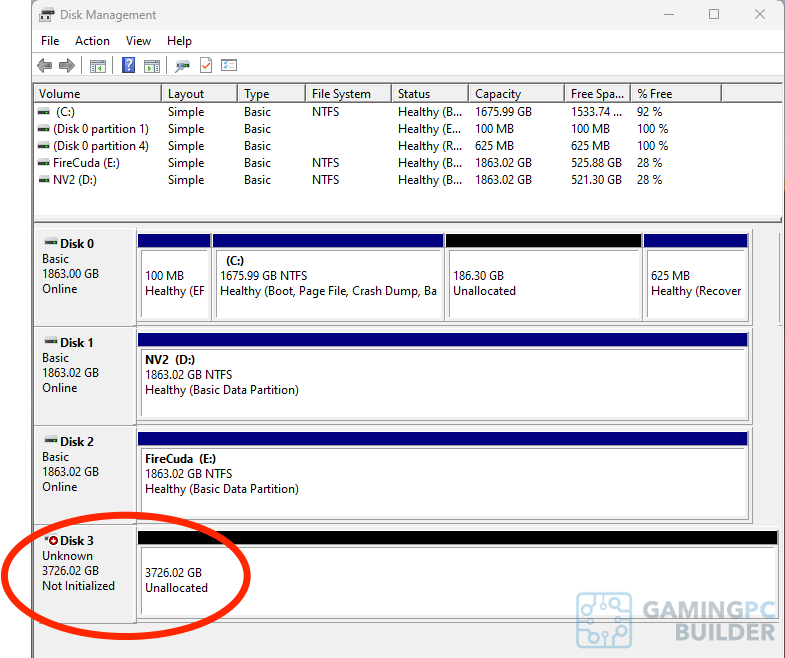
When it detects a new uninitialized disk, Disk Management typically asks you automatically if you want to initialize, which brings you directly to Step 4. In that case, you can skip this step and the next. This isn't always the case, however, meaning that you have to identify your new SSD in the interface. In any event, Disk Management will all of your currently connected storage devices. Your latest addition will show up as unknown, not initialized, and unallocated.
Step 3: Click on Initialize Disk
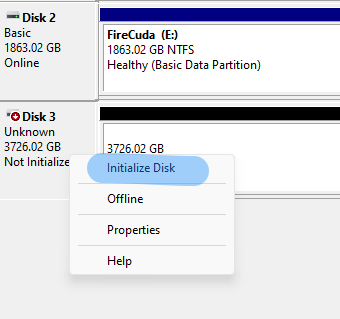
Right-click on the area corresponding to the new disk. This will bring up a menu where you can proceed to left-click on the Initialize disk option.
Step 4: Choose Partition Style
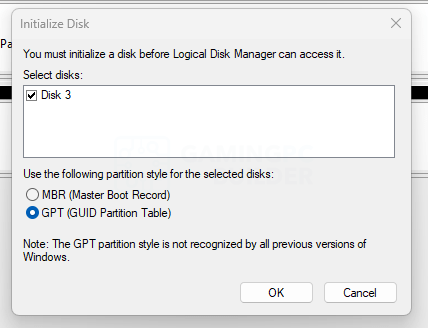
In the pop-up dialog, you have to choose between the MBR (Master Boot Record) and GPT (GUID Partition Table) partition styles. MBR is older and more limited, so in all likelihood you will want to choose GPT here. One of the very few exceptions would be if you are also going to use the drive with a very old 32-bit OS.
Step 5: Create a Partition
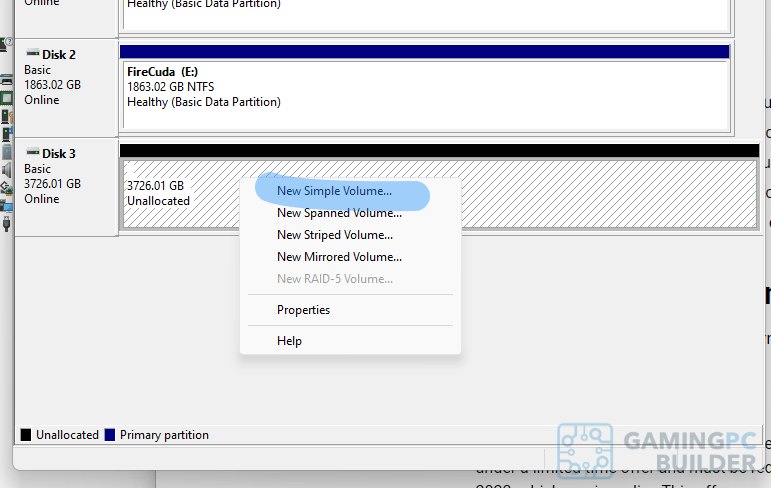
Congratulations! Your new SSD is now initialized and "online" in Windows. To actually use it, however, you must first create and format a partition. Without leaving Disk Management, right-click on the now striped bar showing as Unallocated. Then left-click on New Simple Volume.
Step 6: New Simple Volume Wizard
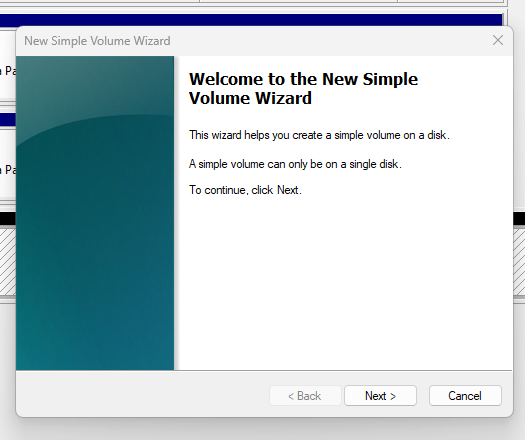
This will bring up the New Simple Volume Wizard and the first thing to do here is to click on Next to continue.
Step 7: Specify Volume Size
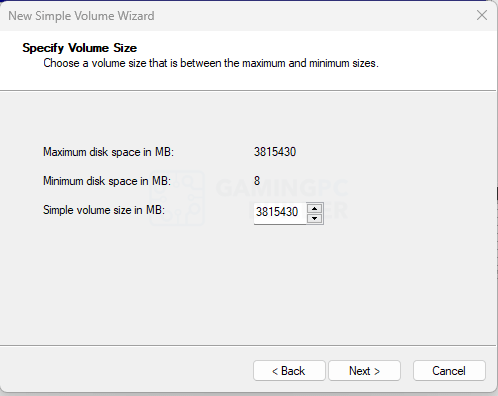
The next step is to specify the volume size. But if you are not going to set up multiple partitions for some reason, this will default to the maximum value (recommended), in which case you don't have to do anything and can just click Next.
Step 8: Assign a Drive Letter
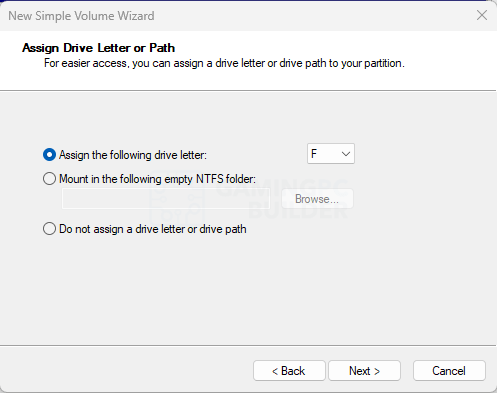
Now you get to choose a drive letter that will map the drive to Windows and show up in File Explorer. Again, the wizard will automatically assign the first available letter and this is typically the most practical option so you can just click Next. You can theoretically choose any letter as long as it doesn't conflict with other local or network drives, but it makes more sense to keep them ordered.
Step 9: Format Settings
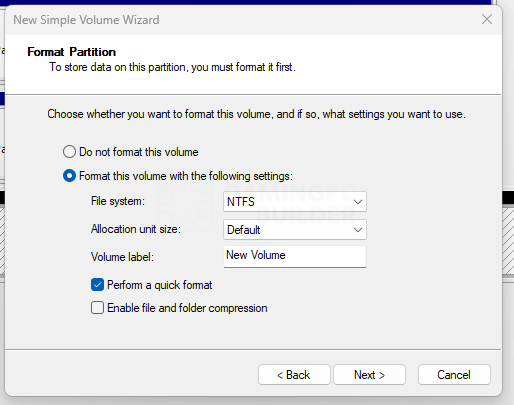
In the formatting options, the NTFS file system is preselected and likely the one you want to use. There is also no need to touch the allocation unit size (another name for the smallest unit of data that can be stored). The same goes for the preselected Perform a quick format check box, just leave it selected. You may, however, want to type in a new volume label instead of the rather uninspiring "New Volume". This is essentially just a name for the drive/partition, and how it will show up in File Explorer and various storage-related dialogs. It is possible to change it later. Either way, click Next when you are ready to finish the process.
Step 10 – Finalize
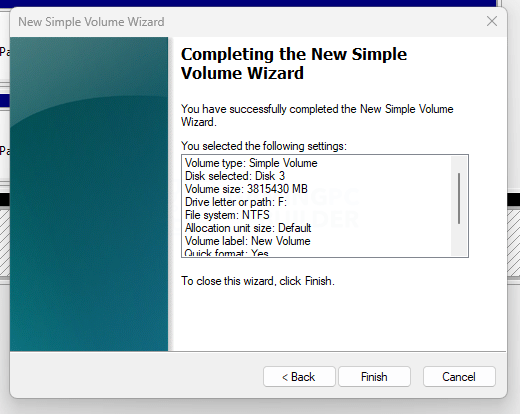
All that remains to be done at this point is to confirm your choices by clicking Finish. If your new drive is a fast SSD, it will be ready to use in a few seconds.
Method #2: Windows Settings
If you are uncomfortable with using the Disk Management tool, another option is to initialize the disk via the Windows Settings app. This is even easier as it hides most of the alternatives found in Disk Management, but also less powerful and flexible for the same reason. You can bring up this app by typing settings on the Start menu (see above).
Step 1: Storage Settings
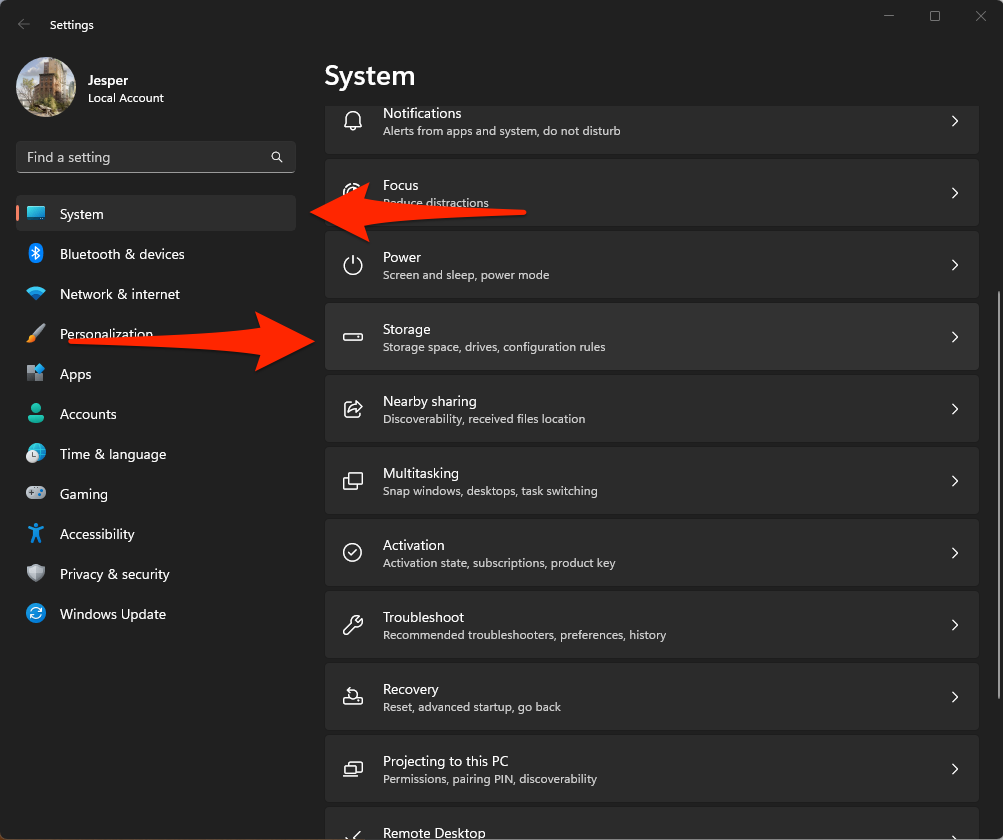
In the Settings app, stay on the System tab and select Storage in the menu.
Step 2: Select 'Disks & Volumes'
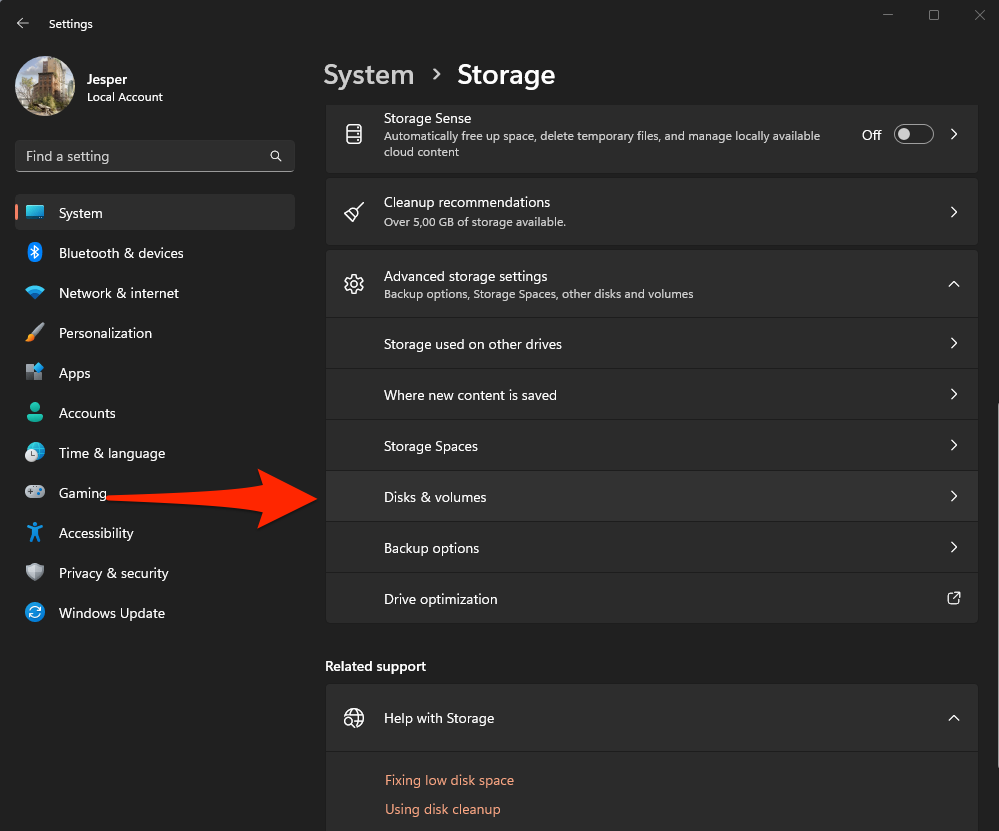
Now scroll down to the Advanced storage settings submenu and expand it, then click on Disks & volumes.
Step 3: Find New SSD
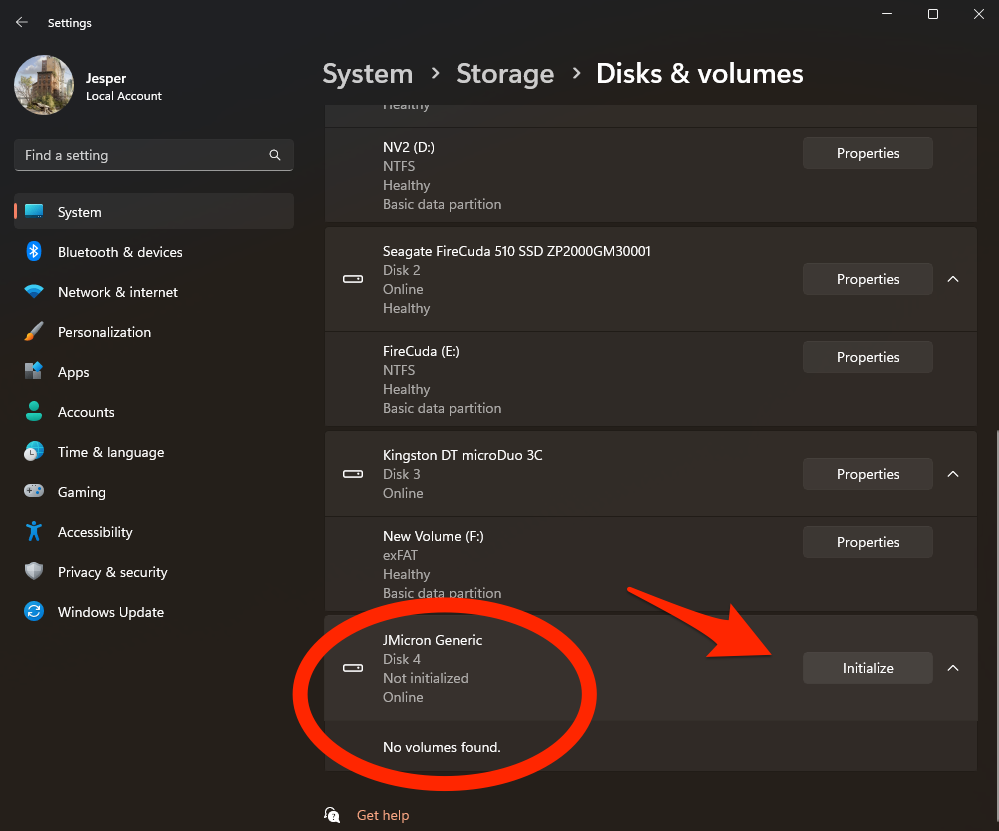
The Disks & volumes listing corresponds to the one found in Disk Management but with a less cluttered interface (and far fewer alternatives). Your newly installed SSD should show up as 'Not initialized' at the bottom of the list. Just click on Initialize to get started.
Step 4: Choose Partition Style
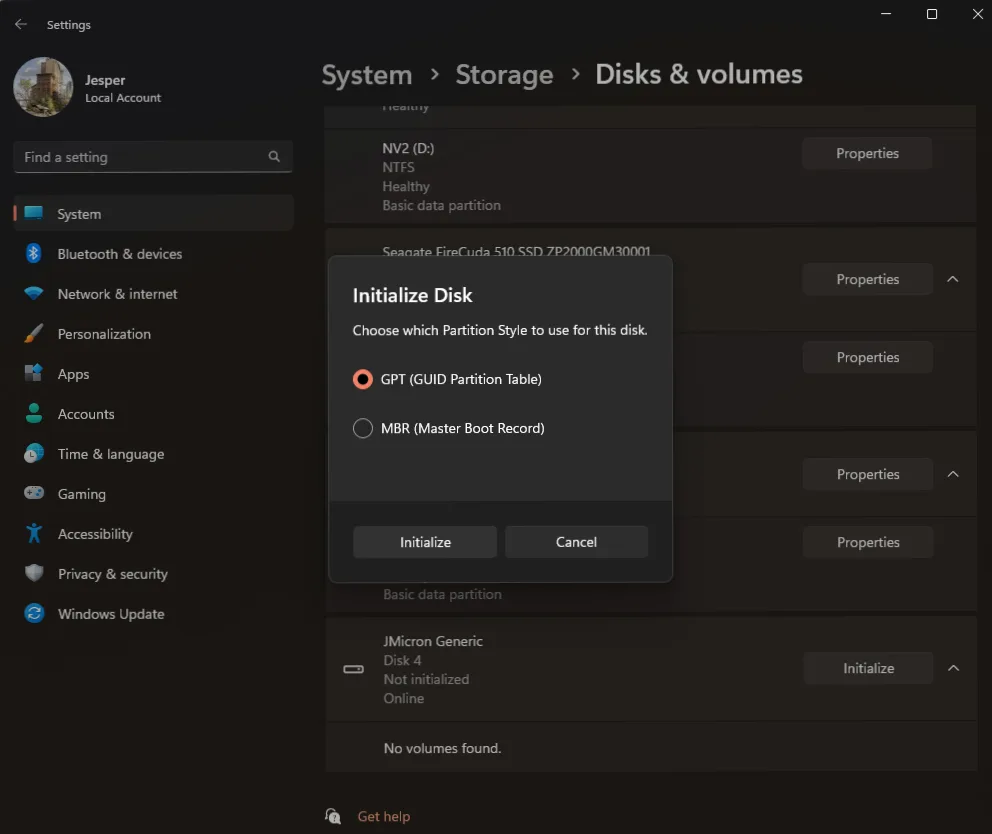
A pop-up will prompt you to select a partition style. For the reasons mentioned previously, you will most likely want to choose GPT and again click on Initialize.
Step 5: Format Your SSD
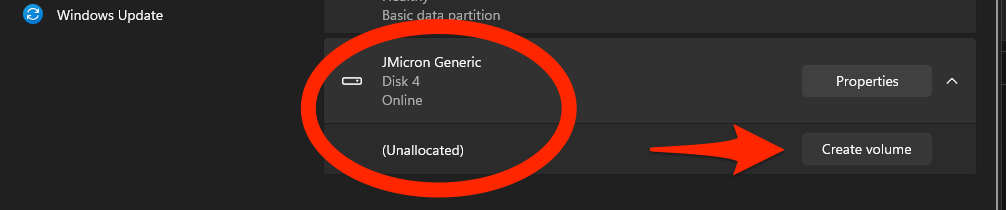
Your drive is now initialized but needs to be formatted before you can use it. Click on Create volume in the drive listing.
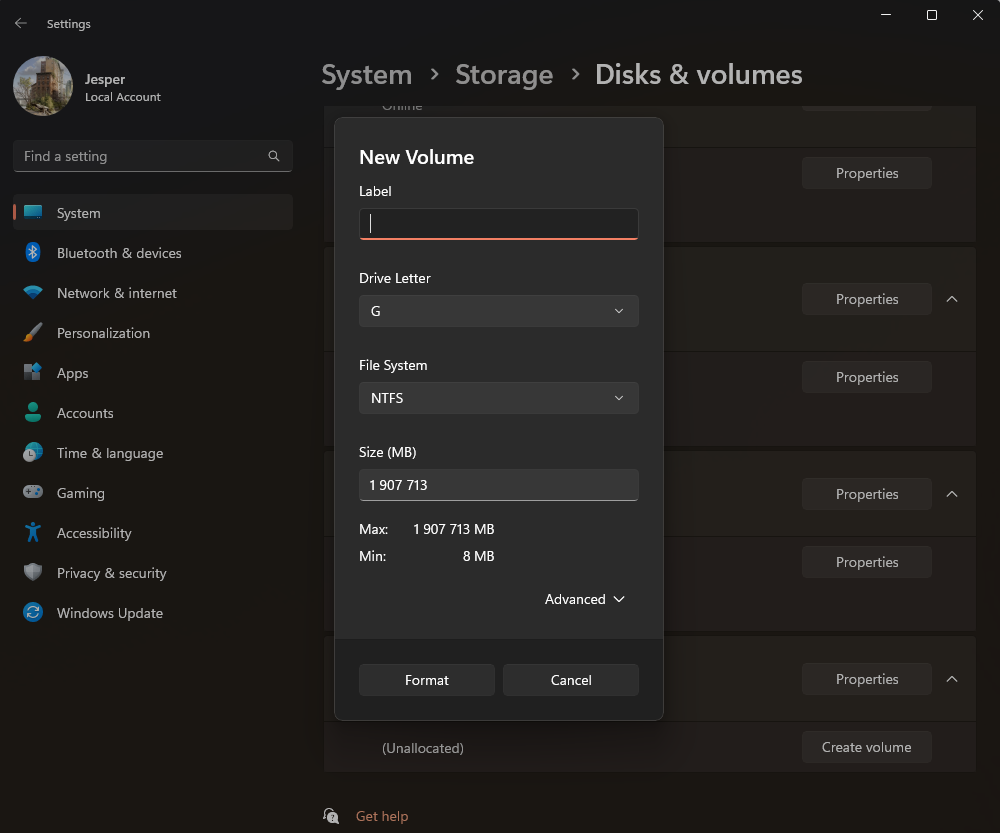
This will bring up another pop-up with prepopulated options and default settings. That means that it will use the maximum space available on the disk, the NTFS file system, and a 4KB allocation unit size, which should be fine for most users. Type in a personal label (name) for the disk and click Format.
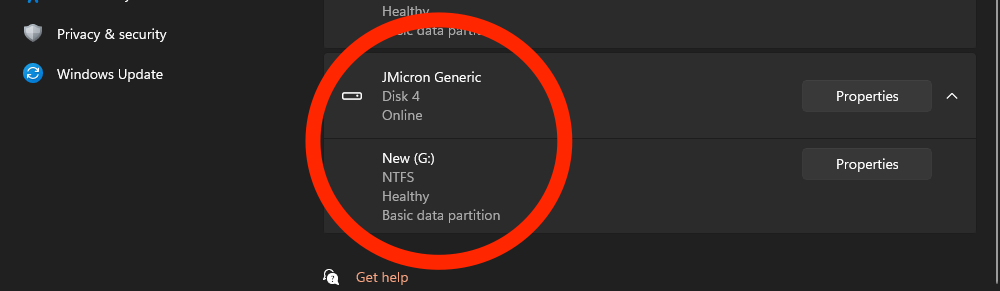
That's it! Your new drive will now show up in File Explorer and all storage-related dialogs in Windows 11.
Frequently Asked Questions
Comments (1)
- McGunnisThanks for this. It helped me a lot.
Comments are closed.